Canon Rebel T3 Operating Instructions: A Comprehensive Guide
Welcome! This comprehensive guide unlocks your Canon Rebel T3’s potential, offering detailed instructions for beginners and experienced photographers alike.
Getting Started with Your Canon Rebel T3
Embark on your photographic journey! This section provides a foundational understanding to quickly begin using your Canon Rebel T3. We’ll cover initial setup, battery charging, and inserting an SD card for image storage. Familiarize yourself with basic operations before diving into advanced features.
Understanding the camera’s layout and controls is crucial. This guide will help you navigate the menus and shooting modes with confidence, ensuring a smooth and enjoyable experience from the very start.
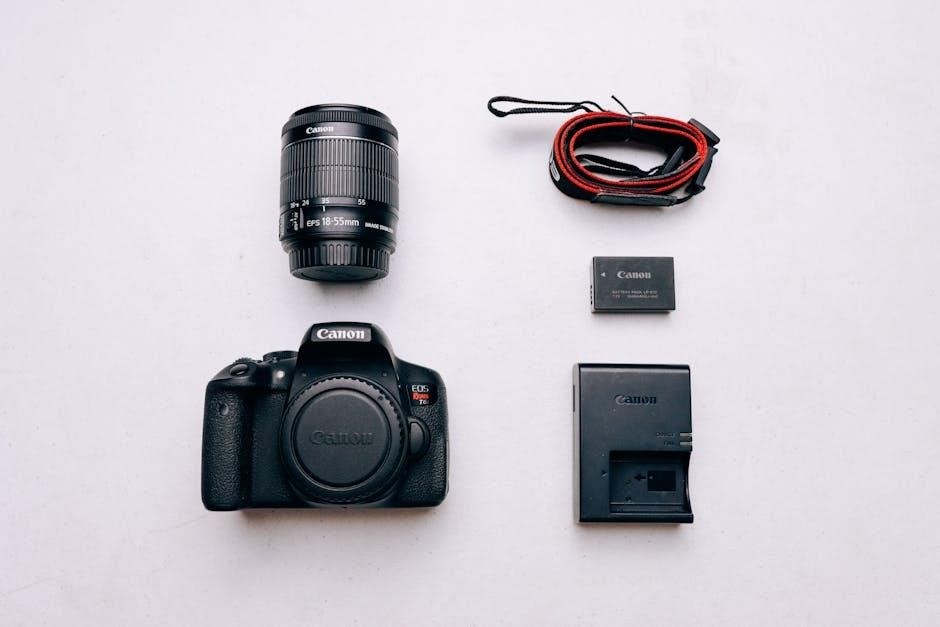
Unboxing and Initial Setup
Let’s get your Rebel T3 ready! Carefully unpack the camera body, lens, battery, charger, and included cables. Charge the battery completely before first use – this typically takes a few hours. Insert a compatible SD card into the card slot.

Attach the lens by aligning the marks and twisting gently. Power on the camera and follow the on-screen prompts to set the date, time, and language preferences for personalized operation.
Understanding the Camera Body and Controls
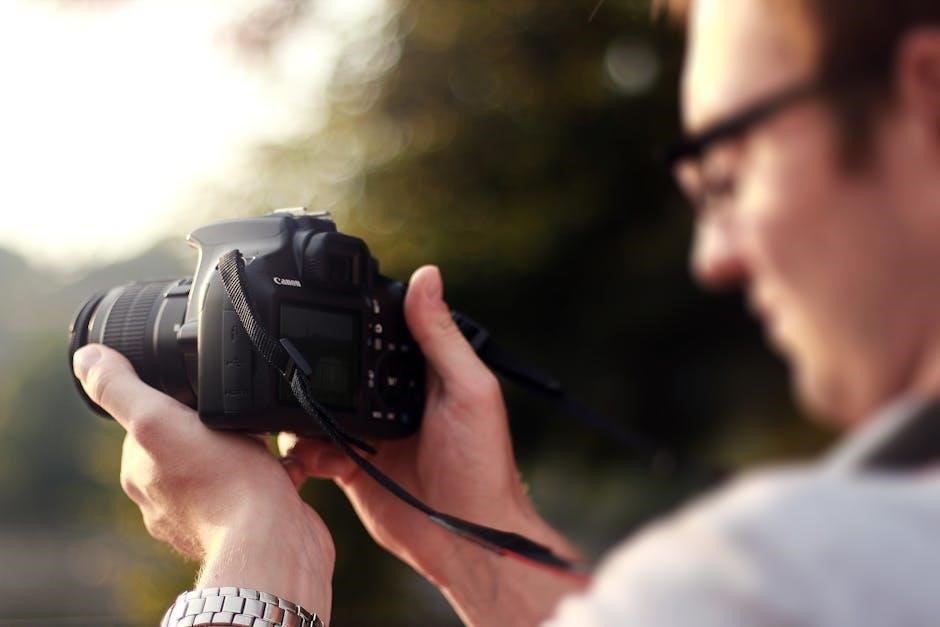
Familiarize yourself with the layout! The Canon Rebel T3 features a clearly designed body with essential controls readily accessible. Locate the shutter button, mode dial, and control dial for adjusting settings.
The rear panel houses the LCD screen, menu buttons, and directional pad for navigation. Understanding these elements is crucial for efficient operation and exploring the camera’s full capabilities.
Front Panel Overview
Key components are here! The front panel of the Canon Rebel T3 prominently features the lens mount, allowing for interchangeable lens attachment. You’ll also find the autofocus assist beam, aiding in low-light focusing.
The shutter button initiates image capture, while the depth-of-field preview button simulates the aperture’s effect. Understanding these controls is fundamental for mastering your camera’s operation.
Rear Panel Overview
Explore the controls! The rear panel houses the LCD screen for image review and menu navigation. The directional buttons facilitate menu selection and settings adjustments.
The ‘Set’ button confirms choices, while the ‘Q’ button provides quick access to frequently used settings. The playback button allows image review, and the trash can deletes unwanted photos. Familiarize yourself with these essential controls!
Top Panel Overview
Discover key functions! The top panel features the power switch, shutter button, and mode dial for selecting shooting modes like Auto, Program, Aperture Priority, and Manual.
The control dial adjusts settings within selected modes. You’ll also find the pop-up flash release button. Understanding these controls is crucial for efficient operation and creative control over your photography.
Understanding the Menu System
Navigate with ease! The Canon Rebel T3’s menu system organizes settings into categories for image quality, autofocus, exposure, and more. Access it via the ‘Menu’ button.

Use the directional buttons to navigate and the ‘Set’ button to confirm selections. Customizing these settings allows you to tailor the camera to your specific shooting preferences and achieve optimal results.
Navigating the Main Menu
Explore the options! Pressing the ‘Menu’ button reveals the main menu, divided into distinct tabs represented by colored icons. Use the cross keys to cycle through these tabs – shooting, creative, playback, and setup.
Within each tab, scroll through options using the up/down keys, and select with the ‘Set’ button. Remember to exit the menu by pressing the ‘Menu’ button again when finished.
Customizing Menu Settings
Personalize your experience! The Canon Rebel T3 allows extensive customization. Within the menu, adjust image quality, autofocus behavior, and display settings to match your preferences. Explore options like beep sounds, date/time format, and sensor cleaning.
Don’t hesitate to experiment! Changes are easily reversible. Remember to consult the camera’s manual for detailed explanations of each setting’s function and impact on image capture.
Shooting Modes Explained
Unlock creative control! The Rebel T3 offers various shooting modes for different scenarios. Auto Mode simplifies operation for beginners, while Program Mode (P) allows some control over settings. Aperture Priority (Av) and Shutter Priority (Tv) offer focused adjustments.
For full manual control, select Manual Mode (M). Understanding each mode empowers you to capture stunning images tailored to your vision and the shooting environment;
Auto Mode (Full Auto)
Effortless photography! Full Auto mode is perfect for beginners, letting the camera handle all settings – aperture, shutter speed, ISO, and white balance. Simply point and shoot for instantly beautiful results. This mode intelligently analyzes the scene, optimizing settings for the best possible image quality.
It’s ideal for everyday snapshots and quick captures, removing the complexity of manual adjustments. Enjoy hassle-free photography!
Program Mode (P)
Creative control with assistance! Program mode (P) allows the camera to select both aperture and shutter speed, while you retain control over other settings like ISO, white balance, and exposure compensation. It’s a step up from Full Auto, offering more creative flexibility.
This mode is excellent for situations where you want a balance between convenience and control, letting the camera handle the technical aspects while you focus on composition.
Aperture Priority Mode (Av)
Depth of field control! Aperture Priority (Av) mode lets you choose the aperture (f-stop), controlling depth of field – how much of the image is in focus. The camera then automatically selects the appropriate shutter speed for correct exposure.
Lower f-numbers (e.g., f/1.8) create shallow depth of field, ideal for portraits, while higher f-numbers (e.g., f/16) yield greater depth of field for landscapes.
Shutter Priority Mode (Tv)
Freeze or blur motion! In Shutter Priority (Tv) mode, you set the shutter speed, controlling how long the camera’s sensor is exposed to light. The camera automatically adjusts the aperture for proper exposure.
Fast shutter speeds (e.g., 1/1000s) freeze action, perfect for sports, while slow shutter speeds (e;g., 1/30s) create motion blur, ideal for artistic effects or low-light situations.

Manual Mode (M)
Total creative control! Manual (M) mode grants you complete authority over both aperture and shutter speed, allowing for precise exposure adjustments. This mode requires understanding the relationship between these settings and ISO.
It’s ideal for challenging lighting conditions or when you desire a specific artistic look. Mastering Manual mode unlocks your full photographic potential, offering unparalleled customization.
Focusing Modes and Techniques
Achieve sharp images! The Canon Rebel T3 offers various focusing modes to suit different shooting scenarios. One-Shot is perfect for stationary subjects, locking focus when the shutter button is half-pressed.
AI Servo continuously tracks moving subjects, maintaining focus as they change position. Explore manual focus for precise control, especially in low light or macro photography, utilizing the viewfinder for accuracy.
Autofocus Modes (One-Shot, AI Servo)
Master autofocus! One-Shot AF is ideal for still subjects; half-press the shutter to lock focus, then fully press to capture the image. AI Servo AF excels with moving subjects, continuously tracking focus as they move within the frame.
Select the appropriate mode via the AF mode setting in the camera menu. Experiment to understand which mode best suits your photographic needs and subject matter.
Manual Focus Operation
Take control! Switch your lens to ‘MF’ (Manual Focus) and rotate the focusing ring on the lens barrel to achieve sharp focus. Utilize the viewfinder and zoom in on your subject for precise adjustments.
This method is perfect for situations where autofocus struggles, like low light or macro photography. Practice makes perfect – refine your technique for consistently sharp manual focus results.
Understanding Exposure: Aperture, Shutter Speed, and ISO
Mastering light! Exposure is the amount of light reaching the camera sensor, controlled by aperture, shutter speed, and ISO. Aperture (f-stop) controls depth of field, shutter speed controls motion blur, and ISO controls sensor sensitivity.
Balancing these three elements is crucial for well-exposed photos. Experiment with different settings to understand their impact on your images and achieve creative control.
The Exposure Triangle
Visualize the connection! The exposure triangle illustrates the relationship between aperture, shutter speed, and ISO. Changing one setting necessitates adjusting others to maintain proper exposure.
A wider aperture or slower shutter speed lets in more light, requiring a lower ISO. Conversely, a narrower aperture or faster shutter speed needs a higher ISO. Understanding this interplay is fundamental to photographic control.
ISO Settings and Noise Reduction
Manage sensitivity! ISO determines your camera’s sensitivity to light. Lower ISOs (100-400) produce cleaner images, ideal for bright conditions. Higher ISOs (800+) are useful in low light, but introduce digital noise – graininess.
The Rebel T3 offers noise reduction features to minimize this effect. Experiment with different ISO settings and noise reduction levels to find the optimal balance between brightness and image quality.
Working with Lenses
Expand your vision! The Canon Rebel T3 utilizes Canon’s EF and EF-S lens mounts, offering a vast selection of lenses to suit various photographic needs. EF lenses are compatible with full-frame cameras, while EF-S lenses are designed specifically for APS-C sensors like the T3’s.
Attaching a lens involves aligning the marks and twisting until it clicks. Detach by pressing the release button and gently rotating.
Canon EF and EF-S Lenses
Understanding lens compatibility is key! Canon EF lenses offer a broader image circle, working on both full-frame and APS-C cameras like the Rebel T3. EF-S lenses are optimized for APS-C sensors, providing a more compact and affordable option.
Choosing the right lens depends on your photographic style and budget, offering diverse focal lengths and apertures.
Lens Attachment and Detachment
Attaching a lens is straightforward: Align the white dot on the lens with the dot on the camera body. Gently push and twist clockwise until it clicks securely. Detachment requires pressing the lens release button on the camera body.
While holding the button, twist the lens counter-clockwise and carefully remove it. Always store lenses with the rear cap on to protect the glass.
Using the Built-in Flash
The Rebel T3’s built-in flash is versatile for various lighting situations. Access flash settings via the flash icon on the camera’s rear panel. Flash Modes include Auto, Fill-in (forces flash), and Red-eye Reduction.
Flash Exposure Compensation allows adjusting flash intensity. Experiment with these settings to achieve optimal illumination and avoid harsh shadows or washed-out images.
Flash Modes (Auto, Fill-in, Red-eye Reduction)

Auto mode lets the camera decide when to fire the flash, ideal for general use. Fill-in forces the flash to fire, brightening subjects against a bright background. Red-eye Reduction emits a pre-flash to constrict pupils, minimizing red-eye effect in portraits.
Understanding these modes allows for creative control and improved image quality in diverse lighting conditions.
Flash Exposure Compensation
Flash Exposure Compensation (FEC) adjusts the flash output, overriding the camera’s automatic settings. Positive values increase flash power, brightening the image, while negative values decrease it, darkening the image.
FEC is crucial for balancing flash with ambient light, preventing over or underexposure, and achieving desired creative effects in challenging lighting scenarios.
Recording Video with the Canon Rebel T3

The Canon Rebel T3 can record videos in various resolutions and frame rates, including 720p HD. Access video mode via the mode dial. Ensure a compatible SD card with sufficient capacity is inserted for longer recordings.
Adjust audio settings for optimal sound quality. Utilize the zoom function carefully during recording to avoid abrupt changes and maintain stable footage.
Video Resolution and Frame Rates
The Rebel T3 primarily supports 720p High Definition (HD) video recording at 30, 25, or 24 frames per second (fps). These frame rates offer a balance between smoothness and file size.
Higher fps create smoother motion, while lower rates conserve storage space. Resolution determines video clarity; 720p provides good quality for most applications. Experiment to find settings best suited for your needs.
Audio Recording Options
The Canon Rebel T3 features a built-in microphone for recording audio alongside your videos. However, the internal microphone’s quality is limited, especially in windy or noisy environments.
For improved sound, consider using an external microphone connected via the 3.5mm microphone jack. Adjust audio levels manually to prevent clipping or excessively quiet recordings. Monitoring audio with headphones is highly recommended.
Image Playback and Review
The Canon Rebel T3 allows easy image review using the LCD screen. Press the playback button to enter review mode, navigating images with the directional buttons. Zoom in to check focus and detail.
Use the display button to toggle information overlays, like histogram and shooting data. The delete button removes unwanted images – be cautious, as deletion is permanent without card recovery software!
Viewing Images on the LCD Screen
To view photos on your Canon Rebel T3, press the playback button (the triangle and square icon). Images are displayed on the camera’s LCD screen. Use the left and right directional buttons to cycle through your captured photos.
Press the zoom button to magnify images for detailed inspection of focus and clarity. The information display button toggles shooting data visibility.
Deleting Images
To delete photos from your Canon Rebel T3, enter playback mode using the playback button. Select the image you wish to remove, then press the delete button (trash can icon). A confirmation screen will appear; confirm deletion by pressing the delete button again.
You can delete one image at a time or select multiple images for batch deletion. Be cautious, as deleted images are typically unrecoverable!
Transferring Images to Your Computer
Transferring images from your Canon Rebel T3 is straightforward. You can use a USB cable, connecting the camera directly to your computer. Alternatively, utilize an SD card reader for faster transfer speeds.
Once connected, your computer will recognize the camera or card reader as a removable drive, allowing you to copy and paste your photos easily.
Using a USB Cable
Connecting via USB is a simple method for image transfer. First, ensure your Canon Rebel T3 is powered off. Then, connect the mini-USB end of the cable to the camera and the standard USB end to your computer.
Power on the camera; your computer should detect it as a removable drive. You can then copy photos directly from the camera’s storage.
Using an SD Card Reader
For faster transfers, utilize an SD card reader. Remove the SD card from your Canon Rebel T3 and insert it into the reader, then connect the reader to your computer via USB.
This method bypasses the camera’s internal processing, resulting in quicker image access and transfer speeds. It’s ideal for large photo batches!
Basic Troubleshooting
Encountering issues? First, check for common error messages displayed on the LCD screen – consult the camera’s manual for specific interpretations. If the camera won’t power on, verify the battery is fully charged and correctly installed.
Ensure the SD card is properly inserted. For persistent problems, a factory reset might resolve software glitches.
Common Error Messages
Error 90: Indicates a mechanical issue, often with the shutter. Requires professional repair. Err 00: Suggests a lens communication problem – reattach the lens or try a different one. CL: Lens error; clean the lens contacts.
Battery symbol blinking: Low battery; replace or recharge. Consult the Canon manual for a complete list and detailed solutions to these and other errors.
Battery Issues
Low Battery Life: Ensure you’re using a genuine Canon battery (LP-E10). Avoid prolonged use of the LCD screen in Live View mode, as it drains power quickly. Battery Not Charging: Check the charger and power outlet.
Battery Symbol Blinking: Indicates a failing or incompatible battery. Replace it promptly. Store batteries in a cool, dry place when not in use to maximize lifespan.